My latest released project — An experimental point & click narrative game inspired by my indie game dev career
1. Overview
NOTE: This game is best experienced with as little knowledge as possible (see store page). If you are interested in this project, I highly recommend playing through the game (available for free on Steam, ~1.2 hours in length) before reading the full details below to get the intended experience.
“nothing_matters” is an experimental narrative game inspired by my personal experience as an indie developer. It features three different sections with escalating complexity, each with distinct visual design and gameplay. The game is primarily a point & click adventure accompanied by minigames, that ends with a climactic FPS. It is a short experience designed to be played in one session (~1.2 hours, checkpoint saves available). Although not intended to be a horror game, nothing_matters features an unsettling and disturbing atmosphere based in realism.
Many aspects of nothing_matters are kept abstract by design. Players are encouraged to make their own interpretations of the experience. However, for the sake of this portfolio page, this is what I had in mind before and during development:
"nothing_matters" is a nihilistic juxtaposition of the games industry and modern consumer capitalism (in the perspective of both developers and players). This concept is conveyed through satirical gameplay such as patronizing tutorials and overdesigned UI elements. The core theme of hyper production and consumerism is set in an exaggerated dystopian world to explore how/if art fits into a futuristic bureaucratic technocracy. I also wanted to highlight the mundanity of the creative process as it is often glorified as a strictly enjoyable and linear procedure.
My primary goal for this project is to stylistically simulate the experience of being an artist, in hopes to resonate with both creative and non-creative audiences. Ultimately, the game’s message is intended to be positive; encouraging artists to keep creating despite obstacles outside of their control.
2. Highlights
- Fully featured narrative game released on Steam, developed completely solo on Unity (Built-in Renderer)
- "Very Positive" Steam reviews (173 reviews, 85% positive) as of November 2023
- Steam achievements implemented to guide players to all the game's hidden content (Using Steamworks.NET)
- Total of 40 USD spent to develop the game (all for 3D models in the FPS section)
- Communication with users to quickly fix bugs post release
- Short game length, with a focus on quality and detail
- All game systems and logic programmed in C# from scratch (no Unity plug-ins)
- Scripted, storyboarded, edited, and voice acted for game reveal trailer
- Reveal trailer was made as an interactive scene in Unity to save time in editing
- Extensive writing done to create an original fictional world
- Set in a near-future hypercapitalistic technocracy, where the world has combined into a single "Unified Earth State"
- Story contains themes of evolution, creativity, choice, and the human condition
- Over 23,500+ words of written content and dialogue (word count only includes Part II)
- Parallel plot written in the form of 136 fictional "MalNews" articles in a writing style that mimics sensationalized news media
- 41 "Wax" documents written for further world building
- Comprehensive HLSL shader and technical art work done to create contrasting and varied visual styles:
- Graphics design work to create custom icons
- Scripted, filmed, and acted in 4 short real life videos as in-universe game content
- Part I: Retro
- An ironic commentary on the societal gamification of life
- Satirical, over the top writing style
- Retro scanline and glow post processing effect with glitch effects
- 3 distinct minigames: "Flip the Coin", "Game of Life" and "Ping"
- Part II: MalusOS
- Detailed functional OS UI (window management, draggable desktop icons, task bars, etc.)
- A more realistic and subtle writing style in contrast with Part I
- "War Game" minigame - a more complex version of Rock Paper Scissors
- "Flip Flop" secret minigame - a simple physics game where the player must bounce a block for as long as possible
- Usable OS Apps for emergent story telling, each with it's own UI design
- Ironically overdesigned UI visuals to mimic modern tropes
- Part III: "9-5" FPS
- Fully featured 3D first person shooter
- PBR graphics with baked and dynamic lighting
- Intended to be a surprise climax to the game, absent from marketing material
- Custom FPS movement controller (improved version from my Bloom Attenuation project)
- Custom bullet shooting and physics solution (see 5.2 FPS Implementation for full details)
Some Context:
I have always considered video games as an artform and wanted to push the limits of how it can be implemented. Although abstract metacommentary is not uncommon in indie games (some would consider it a trope), I wanted to attempt to make a complete game without an explicit goal, gameplay loop, nor concept of winning and losing. See my other projects for more conventional game examples!
This was partially motivated by the end of a multi-year project as I wanted to make something a little different. I expected this concept to be polarizing and hard to market so I decided to release the game for free and keep the game time short to ease the barrier of entry.
3. Game Features
The multiple “parts” of the game is designed to keep the localized gameplay elements fresh and diverse. Each part is more complex than the last to create a sense of escalation and unpredictability. These parts are not only intended to build an evolving story, but also serves as variations of the game’s themes and concepts.
Once again, I highly encourage anyone interested in this project to experience it firsthand, however, a full walkthrough is available here (thanks to Youtuber AlphaBetaGamer) if you would like to view footage of the following gameplay sections. Note: the walkthrough video contains occasional zoomed visuals and music additions not present in the original game.
Development Anecdote:
As a fan of the channel and a way to market the game, I contacted AlphaBetaGamer to see if they would be interested in showcasing my game on the channel as nothing_matters seemed to fit the kind of games they tend to make videos on. To my surprise, they responded by saying they found my game organically and were already editing their completed playthrough footage.
3.1 Part I: Retro
The game starts with a low fidelity aesthetic and aggressive writing style set a tone that contrasts the following parts of the game. The distinctive retro visuals are created with custom post processing involving fake procedural scan lines, uv displacements and bloom based illumination (see 5. Implementation for full details). Each minigame starts as a simple concept and evolves with more gameplay mechanics.
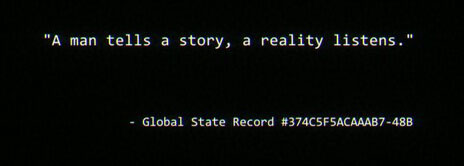 Introductory quote at the start of Part I.
Development Anecdote:
Early in development, a quote was chosen to set the tone of the game in the introduction from The Denial of Death by Ernest Becker (1973), one of the inspirations for this game:
"..in order to turn out a piece of work the author has to exaggerate the emphasis of it,
to oppose it in a forcefully competitive way to other versions of the truth.."
And completing the quote after the “Flip the Coin” section:
"and he gets carried away by his own exaggeration, as his distinctive image is built on it."
Unfortunately, I could not negotiate the rights to use the quote from Simon & Schuster as I was informed they “do not license content to individuals”. I settled by writing an original diegetic quote.
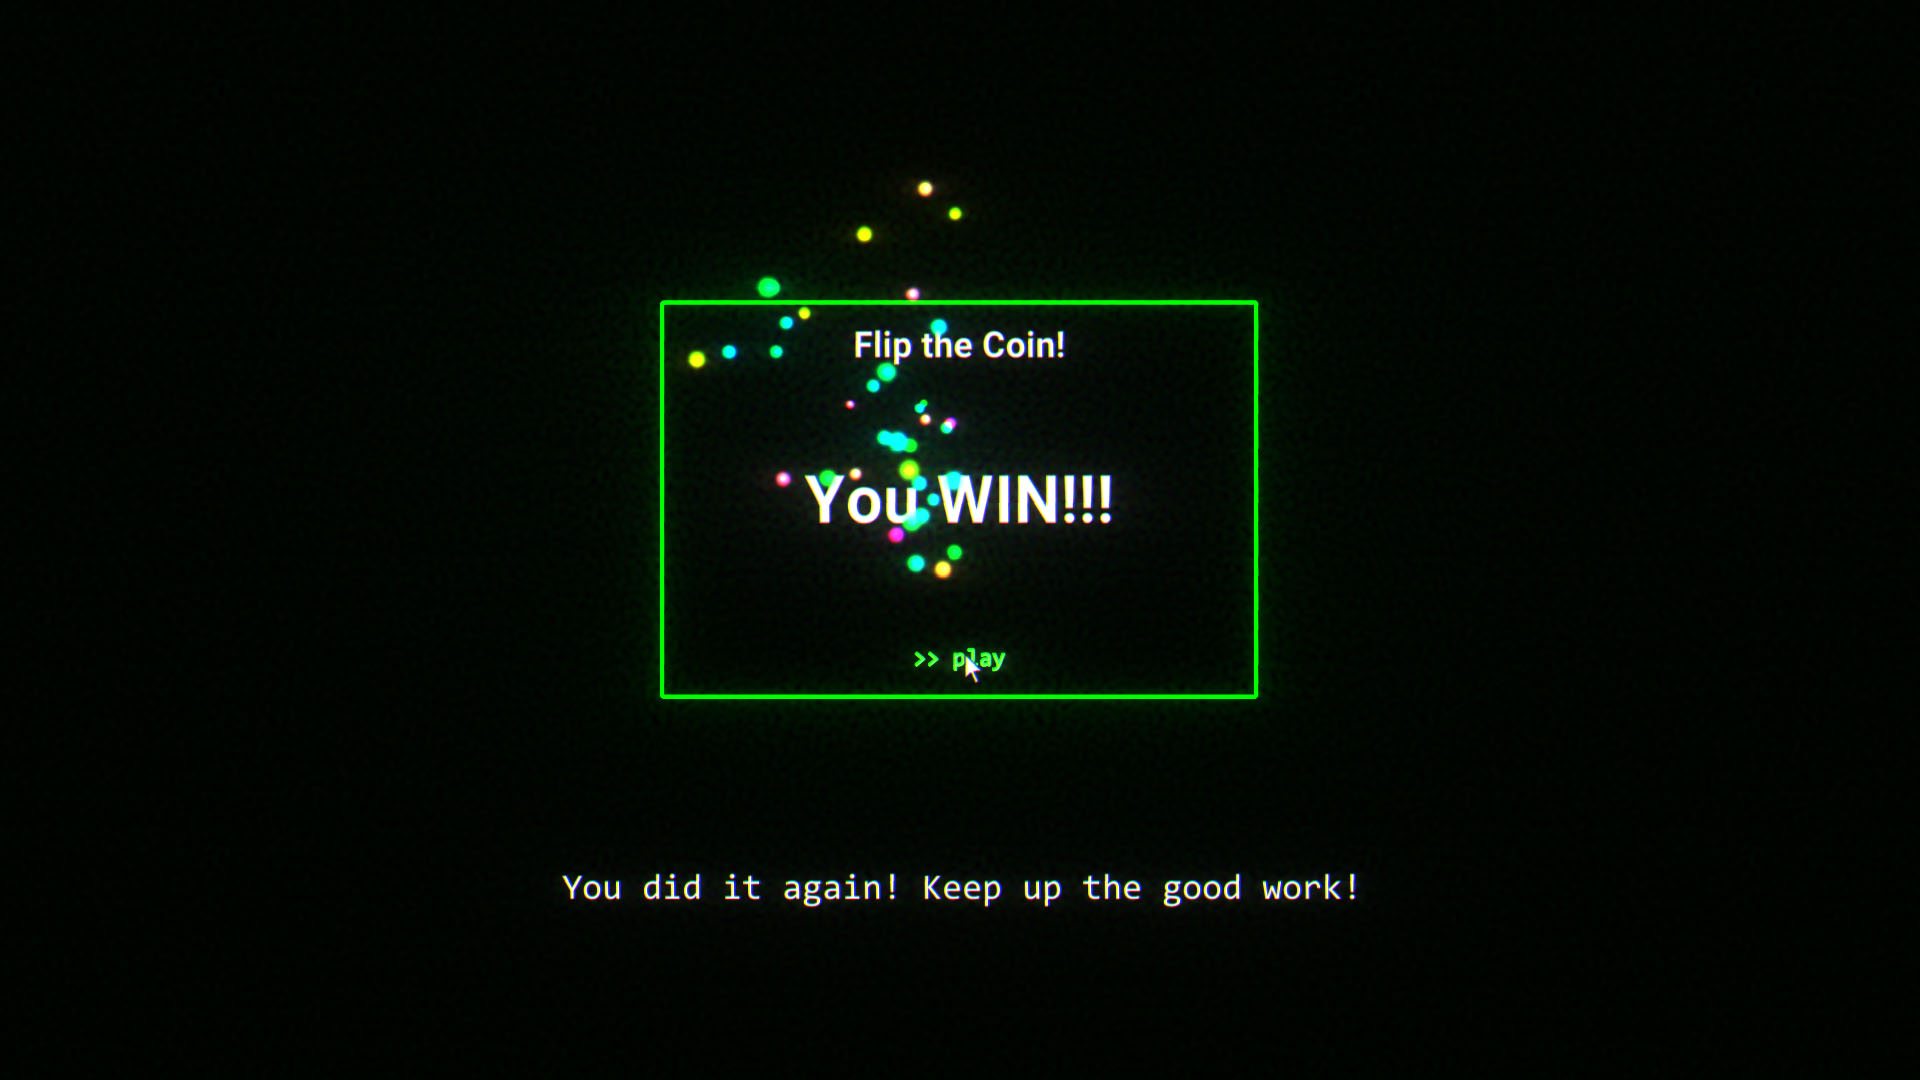
Flip the Coin
A deconstruction of what a game is, starting with only the bare essentials: a “play” button that indicates whether the player has won or loss.
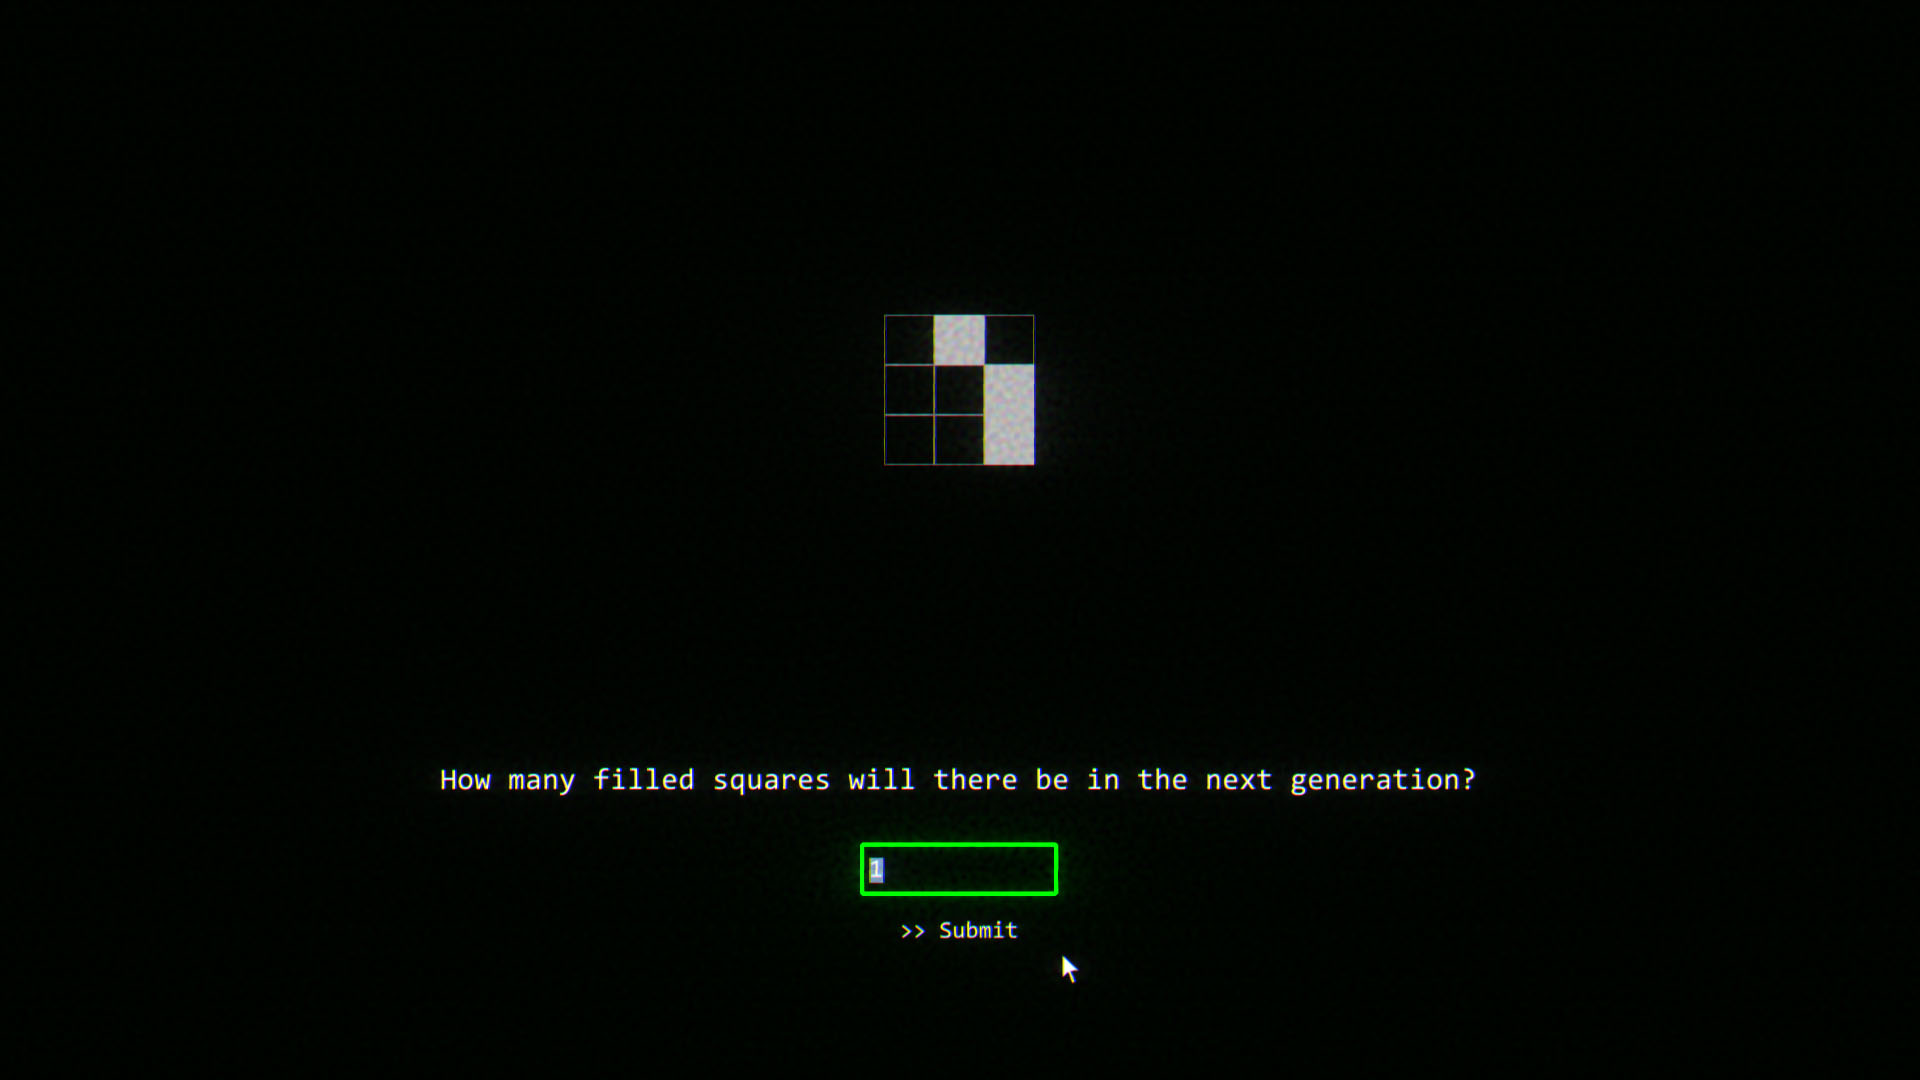
Game of Life
A simple puzzle/guessing game using a real time implementation of Conway’s Game of Life.
Development Anecdote:
A classic and embarrassing case of premature optimization: This minigame was implemented early in the game’s development. So with the seemingly abundant time and excitement of a new project, I decided to use this opportunity to learn multi-threading in Unity; using the novel Unity Jobs system and Burst compiler. This was encouraged by slowdowns happening with bigger Game of Life simulation grids.
A day of converting everything into value types later, the multi-threaded simulation seems to be working. However, no performance difference. Turns out the slowdown was primarily caused by redraws in the UI system whenever a grid element is updated (the entirety of Part I and II is implemented in the UI system to easily accommodate for all screen sizes). I ended up simply using slightly smaller grid sizes in the later parts of this section. Lesson once again learned.
Ping
A detailed clone of the original Pong. Evolves into a pseudo multiplayer game (bots with game and chat AI). Name of the game and creator Al Alcorn slightly altered to avoid copyright issues.
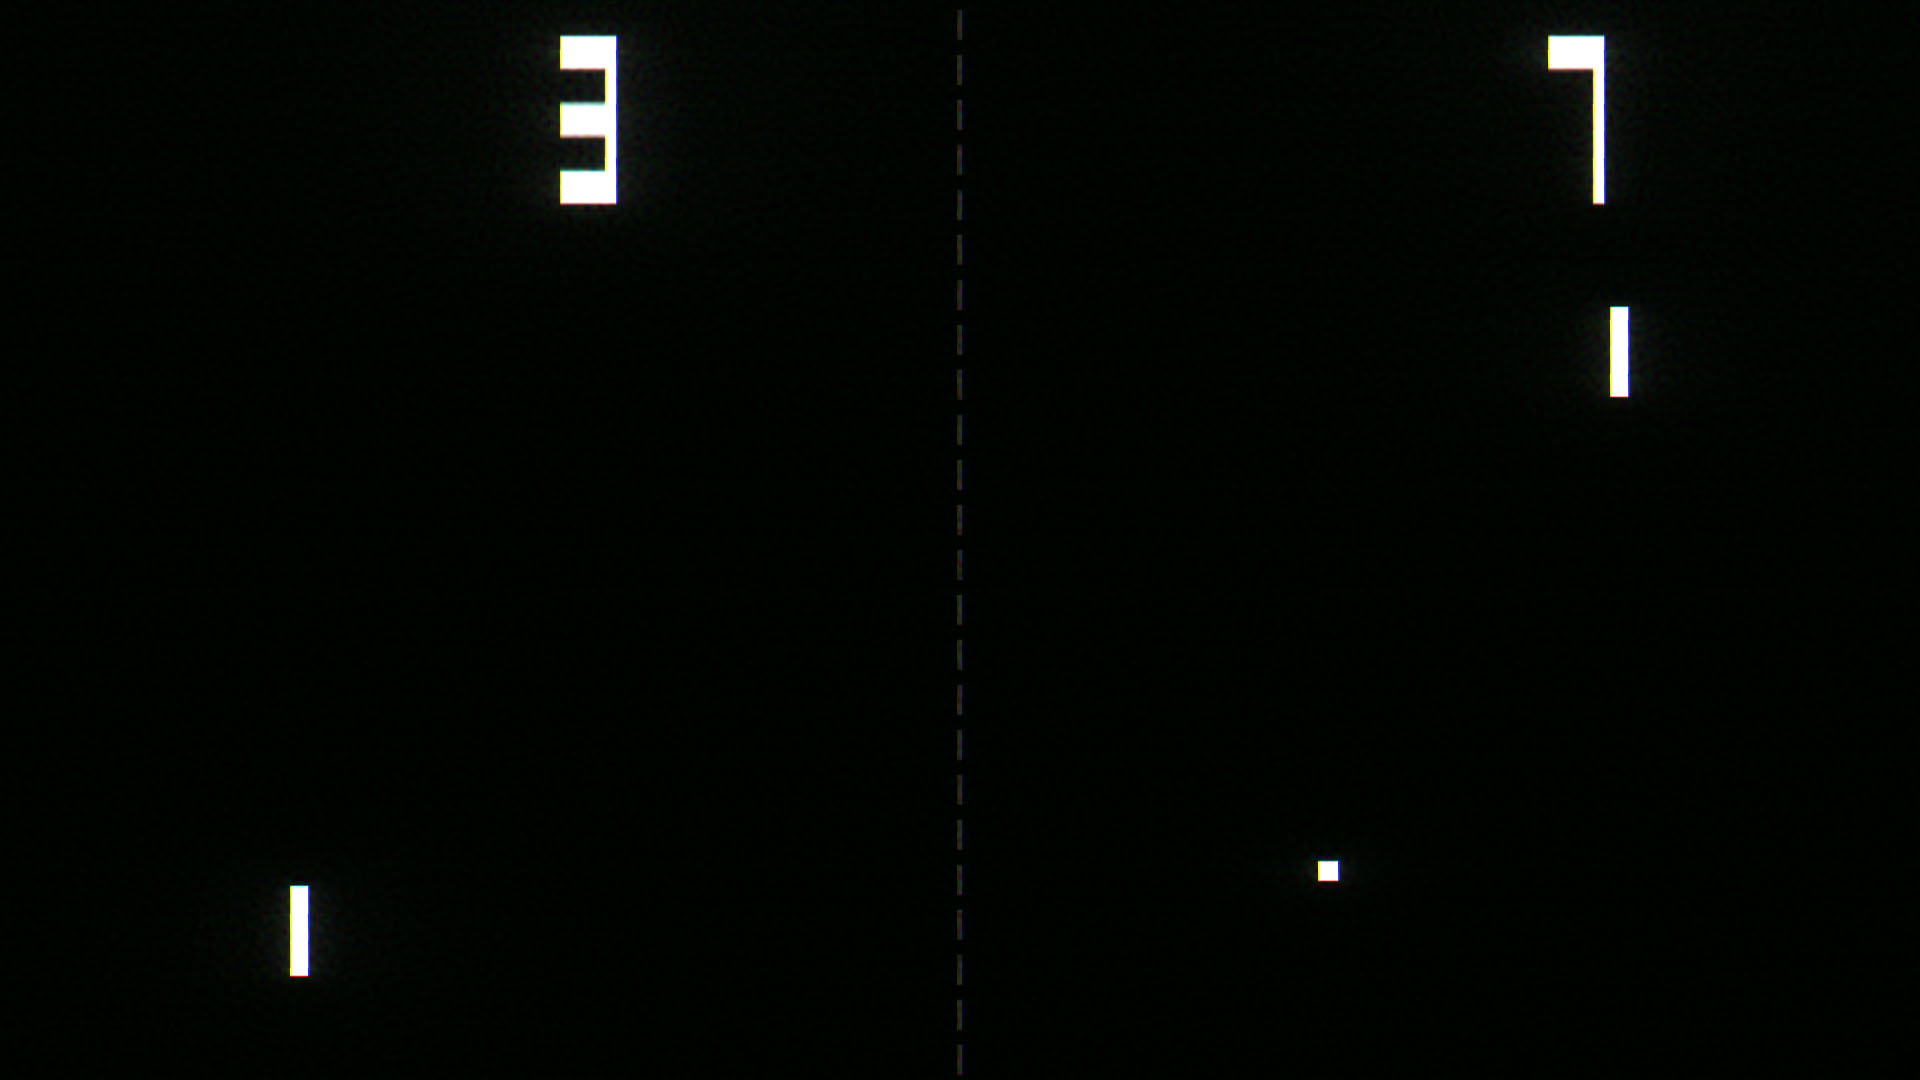 Pong emulation includes “floaty” controls (paddle inertia) and asymmetrical offsets for the score displays.
3.2 Part II: MalusOS
Part II is the largest part of the game, MalusOS is an elaborate implementation of an in-universe OS. Explore a clean, user friendly UI as a dark narrative unfolds in the background. All while countless app and news notifications fight for your attention.
Spoiler: Secret Optional Mini Game “Flip Flop”
Ironically Designed
Although very polished, the friendly UI/UX design in MalusOS is intentionally overdesigned to mimic contemporary UI design tropes. Pointless, drawn out UI animations and text fades are frivolously added to symbolize the shallow “form over function” philosophy of this game’s universe.
SubFrag: A particularly egregious example of an intentionally overdesigned UI.
Development Anecdote:
Many of the ridiculous news headlines were taken directly from real life, with slight changes to fit the game’s world and avoid copyright issues. An attempt was also made to emulate the sensationalized writing style from real news sources in the articles; such as calling celebrities by their most famous roles/affiliations rather than using their names and exploiting tragedy to push biased agendas. This is in contrast with the more technical and grounded writing of the “Wax” documents, which gives an anthological look into the inner workings of the dystopian world.
3.3 Part III: "9-5" FPS
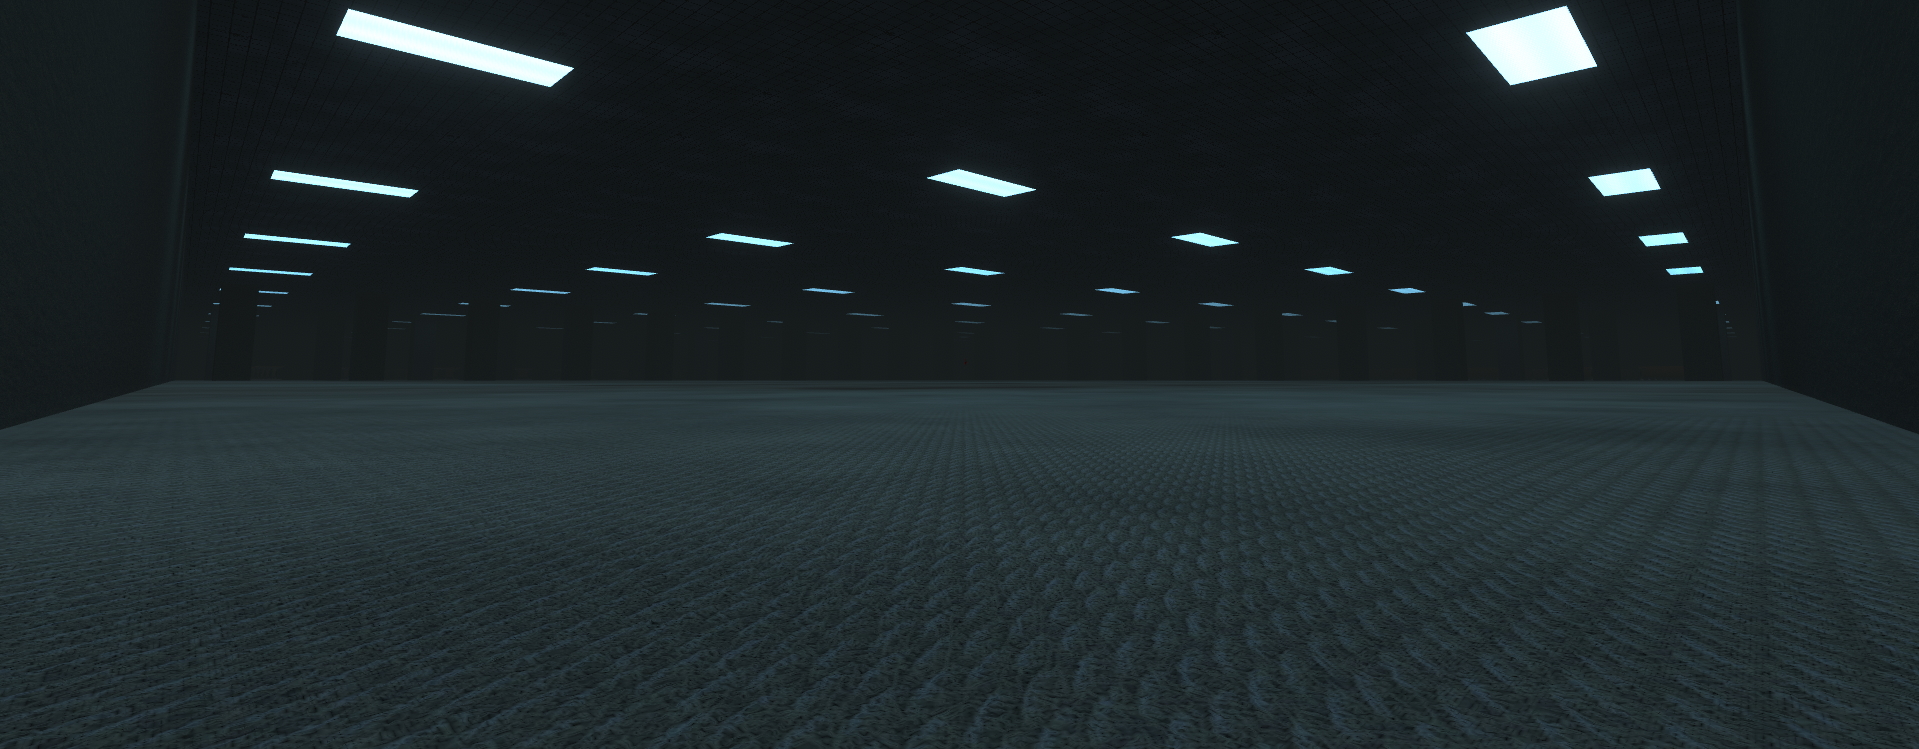
A surprise 3D section of the game. Comprehensive first person shooter featuring movement mechanics (e.g. jump, crouch, sprint with stamina bar), gun mechanics (e.g. recoil, ADS, and reloading) and realistic PBR graphics with baked/dynamic lighting, decals, physics enabled ragdolls and detailed blood effects. This section is designed to be an cathartic and action packed crowd pleaser after going though a largely conceptual experience. Players must kill to survive as long as possible in an eerie and otherworldly office space.
Development Anecdote:
As a developer who has primarily made 2D projects, I took this opportunity to challenge myself and learn to create a FPS for the first time. Although a large part of the implementation is easily transferrable from 2D as expected (general work with quaternions and position vectors); things such as dynamic decals, first person bullet visuals, and lighting took some time to figure out, see 5.2 FPS Implementation for details.
Bonus trivia 1: A subtle rising Shepard tone (inspired by Hans Zimmer) loops throughout the FPS section to represent the theme of survival and capitalistic growth.
Bonus trivia 2: The dramatic death sound in the intro was voice acted by me by gargling water, along with the audible sigh at the end of the FPS.
3.4 End Game / Achievements
Although this game is designed to be completed in one sitting, bonus features and secrets are added for players who want to explore the world further. After the game is completed, a sandbox version of Part II and Part III will be unlocked, accessible from the main menu. Players can take as long as they need to read all the written content in MalusOS and play a survival version of the FPS. The end game features are designed to provide players with additional content and a method to obtain all the achievements without playing through the whole game again (2 missable achievements in Part I can be obtained by starting a new game and playing a few minutes).
Note: Only “start game” and “quit” buttons are available on a new save file
I decided early in development that this game would be a good opportunity for me to learn how to implement Steam achievements (I ran out of time in my previous Steam release), as well as using it as a game mechanic to guide and encourage users to find all the secret/bonus content I spent time making. This worked very well as players are seen discussing achievement hunting in the game’s Discord channel and in the Steam discussion page. This effect is reinforced by an achievement guide that a player spent time making.
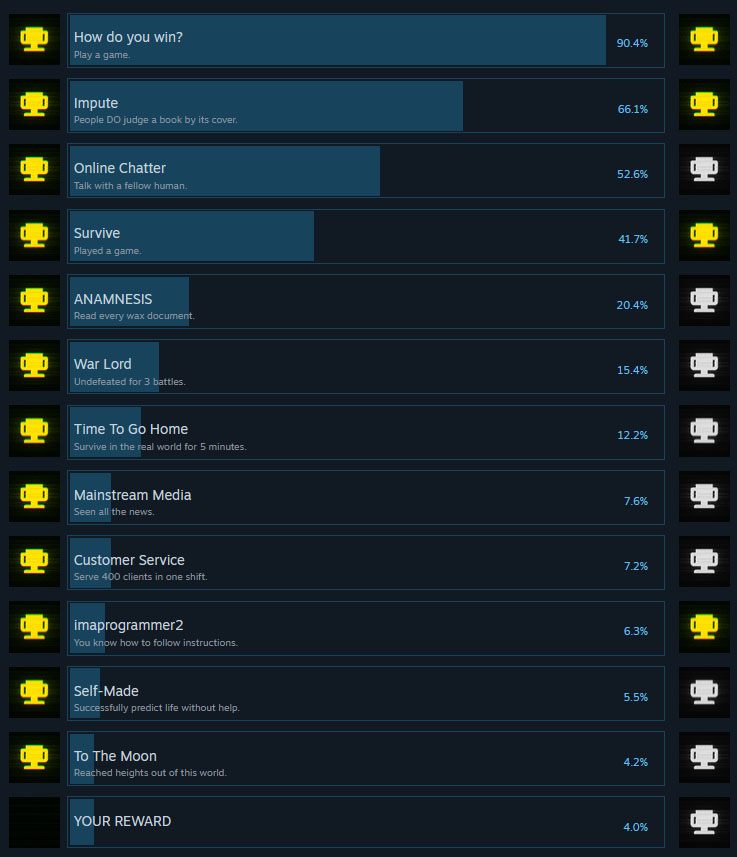 Global achievement distribution.
3.5 Mixed Media
With an interest in film making, I used this project as an excuse to create short real life videos to accompany the lore of the game. These videos were all scripted, acted, and filmed by myself, with the exception of the final scene (a friend operated the camera). More videos were planned, but I ran out of time as more important things needed to be completed for release.
Video created for the game and used in the trailer.
Happy Accident:
The unique glitch effects for all the videos were developed by accident. The videos were recorded on an iPhone, which adds the artifacts if the files are transferred to Windows with the “automatic” file format option (on by default). I found the fix after transferring the first time, but I thought the “free” glitch effects fit in perfectly with the game’s narrative.
So I reverted to the broken iPhone setting and “baked in” the artifacts by importing the glitched footage into a video editing program and rendering the footage into a stable file type to ensure the effect is permanent across all software. I could not recreate these effects with shaders and/or video editing if I tried.
4. Reception
I did not expect this project to appeal to the general public, especially with minimal marketing. Many of the game’s features were developed for my own interest and entertainment, and I debated for a long time whether it was worth releasing at all. Thankfully, this became my most successful project, with “Very Positive” Steam reviews (173 reviews, 85% positive as of November 2023) and various playthroughs posted online.
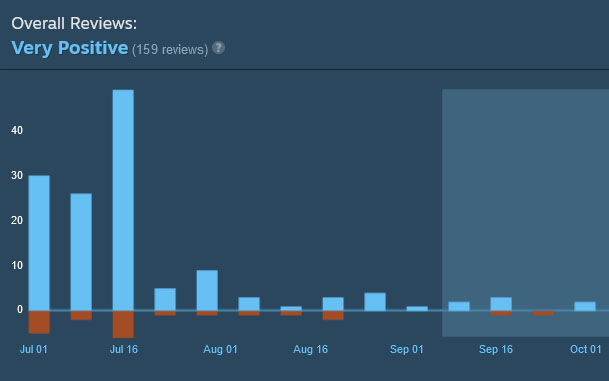 Steam Review Breakdown.
Some highlights of popular media: a 132k view TikTok, a feature on the “AlphaBetaGamer” Youtube channel, and a full live playthrough by Brazilian Twitch streamer “Felps”, with 1.4 million followers. I was especially surprised by the positive feedback from Brazilian viewers/players. It was rewarding to see people resonate with my game despite the language barrier.
5. Implementation
One of the main features of nothing_matters is that it contains a series of polished minigames that evolve over time. Although this is great for game development practice, the drastically different visuals and gameplay required a large volume of ad hoc solutions that only serve small portions of the game. This increases the usual overhead required to implement and debug small features and details that players may or may not notice. Here are some examples:
Part I: Retro
- Framework to create arbitrary text, with parameters to control glitch effects, timing and screen location
- Custom caret implementation for a more fitting aesthetic in certain input fields (frustratingly non-trivial)
- Modular and customizable AI framework for Ping paddle movement and chat (response to player messages, win/loss messages, score messages, etc.)
- Positive and negative edge audio effect for keyboard presses (for Part I and II, with differing set of audio clips)
Part II: MalusOS
- Player stat tracking (serialized) and extensive scripted tutorial in War Game (minigame is completely optional)
- Voronoi-based gradient dissolve shader for War Game "kills"
- MalusOS app states serialized to player save, such as "read" tags in MalNews and Wax articles
- A multi-staged side quest to unlock optional secret minigame Flip Flop, involving a functional OS console with appropriate error messages for invalid commands and command parameters
Part III: "9-5" FPS and Epilogue
- Weapon sway effects based on movement speed and mouse movements for FPS
- Locational damage (i.e. head vs body) detection for high speed bullets
- Customizable difficulty curve (i.e. enemy spawn rate and AI behavior changes over time)
- Object pooled NPCs, bullet projectiles, bullet casings, bullet decals, and blood effects
- Animal Crossing inspired speech audio system for arbitrary text (used in Epilogue only)
5.1 Shader Effects
Custom Post Processing
Considerable effort was put into technical art to create the game’s atmosphere. The screen shader effects in Part I was the first thing I worked on in this game. I wanted to make my own version of the retro/scanline effect, often seen in many indie games. The goal was to create a familiar effect that feels slightly different, to fit the alternate reality of the story (i.e. visual artifacts that are not reflective of real life retro technology).
Custom post processing shader parameters.
Instead of realistic discrete scanlines, I used the frac() function to create a series of small vertical gradients based on screen UV, which are then offset over time to create an animated scanline effect. Two sets of these vertical gradients are combined (multiplied) with differing UV scales and scroll speeds to add a phase shifting effect to the vertical movement. This technique was developed for a hologram shader in my other game — Last Secutor. To make the scanlines visible, gradients are tinted and the pre-tinted values are used to distort the screen image.
Stock bloom with luminance-based visibility for custom shader effect.
I later discovered that I needed to make the scanlines more prominent. So I multiplied the scanline values with a luminance value calculated from the screen image (using relative luminance, line 24 below). This effectively makes the scanlines more prominent near any on-screen elements (Part I is built entirely in Unity’s UI, with no background elements). I applied my custom post processing by applying my screen shader in Unity’s OnRenderImage() function (I learned to do this in my Bloom Attenuation project). This happens to render after Unity’s built in post processing stack, which means the stock bloom I used effects the luminance value calculated. In other words, the more objects glow from bloom, the more it “illuminates” the surrounding scanlines. This visually appealing interaction was admittedly found by accident, but I took advantage of it with HDR materials throughout Part I.
Development Anecdote:
The need for the luminance-based scanline visibility was discovered by accident. I initially developed and previewed the screen shader on one of my two monitors. After tweaking it to exactly what I wanted, I realized the bloomed elements on the screen did not have the same “illuminating” effect to the scanlines on my other monitor. This was caused by the differing color ranges and tendency to color band, which forced me to come up with the luminance solution to keep the effect consistent on all monitors.
The custom chromatic aberration implementation is pretty standard, other than being amplified (multiplied) by scanline values. I wanted to experiment with the CMYK color space to make it a little different, but ultimately ran out of time. To finish the aesthetic, I added some large colored grain from the Unity post processing stack. Conveniently, the grain visibility is also proportional to the amount of bloom, like the scanlines.
Custom Post Processing Fragment Shader
1
2
3
4
5
6
7
8
9
10
11
12
13
14
15
16
17
18
19
20
21
22
23
24
25
26
27
28
fixed4 frag (v2f i) : SV_Target {
    // for screen scrolling
    i.uv.y += _UV_Y_Offset;

    // Scanlines
    fixed4 scanLine1 = frac((i.uv.y + _Time.x * _ScanlineSpeed) * _ScanlineCount);
    fixed4 scanLine2 = frac((i.wPos.y + _Time.x * 0.5 * _ScanlineSpeed) * _ScanlineCount2);

    fixed4 scanLines = scanLine1 * scanLine2 * _ScanLineTint;

    // uv distortion by scanlines
    i.uv += 0.01 * scanLines * _ScanLineUVStrength;

    // Chromatic Aberration
    fixed s = 0.001 * (_ChromaticAberrationAmount + scanLines * 2);
    fixed r = tex2D(_MainTex, i.uv + fixed2(+s, +s)).r;
    fixed g = tex2D(_MainTex, i.uv + fixed2(+s, -s)).g;
    fixed b = tex2D(_MainTex, i.uv + fixed2(-s, -s)).b;
    fixed4 col = tex2D(_MainTex, i.uv);
    fixed4 aberratedColor = fixed4(r, g, b, col.a);

    // Luminance threshold for scanline visibility
    fixed4 originalColor = tex2D(_MainTex, i.uv);
    float luminance = (0.2126f * originalColor.r + 0.7152f * originalColor.g + 0.0722f * originalColor.b);

    fixed4 finalColor = aberratedColor + (scanLines * luminance * _ScanLineVisibility * (1 - aberratedColor.a));
    return finalColor;
}
Note: All variables that start with an underscore (except _Time) are modulated externally in C# code during gameplay.
Sprite/Text Glitch Effect
The iconic glitch effect used prominently in Part I and marketing material is a shader based on this one found online. It works by cleverly splitting up the UV space into horizontal strips, which are then displaced in random intervals. I was happy with the results and customizable parameters, however it was designed to work with 2D sprites and I needed it for text. The original used values in the model view matrix to desync randomized effects, but I could not get this to work with Unity’s font texture atlas. So I had to alter the implementation, with a few additions.
Glitched text shader parameters.
Text Glitch Fragment Shader
1
2
3
4
5
6
7
8
9
10
11
12
13
14
15
16
17
18
19
20
21
22
23
24
25
26
27
28
29
30
31
32
33
34
fixed4 frag(v2f IN) : SV_Target {
    // This ensures that the shader only generates new random variables every [_GlitchInterval] seconds, e.g. every 0.5 seconds
    // During each interval the value whether the glitch occurs and how much the sprites glitches stays the same
    float intervalTime = floor(_Time.y / _GlitchInterval) * _GlitchInterval;

    float timePositionVal = intervalTime;
    // Second value increased by arbitrary number just to get more possible different random values
    float timePositionVal2 = intervalTime + 2.793;

    // Random chance that the displacement glich
    float dispGlitchRandom = rand(timePositionVal, -timePositionVal);

    // For the displacement glitch, the sprite is divided into strips of 0.2 * sprite height (5 equal strips)
    // shiftLineOffset is the random offset for each of the strip's top and bottom boundries
    // With this calculation, each strip's height is slightly randomised
    float shiftLineOffset = float((rand(timePositionVal2, timePositionVal2) - 0.5) / 50);

    // If the randomly rolled value is below the probability boundry and the displacement effect is turned on, apply the displacement effect
    if (dispGlitchRandom < _DispProbability && _DispGlitchOn == 1) {
        float randParam = floor(IN.texcoord.y / (0.2 + shiftLineOffset));
        IN.texcoord.x += (rand(randParam - timePositionVal, randParam + timePositionVal) - 0.5) * _DispIntensity;
        // Prevent the texture coordinate from going into other parts of the texture, especially when using texture atlases
        // Instead, loop the coordinate between 0 and 1
        if (_WrapDispCoords == 1) {
            IN.texcoord.x = fmod(IN.texcoord.x, 1);
        }
        else {
            IN.texcoord.x = clamp(IN.texcoord.x, 0, 1);
        }
    }

    fixed4 mainColor = tex2D(_MainTex, IN.texcoord);
    return IN.color * mainColor.a * IN.color.a;
}
Note: The original shader had a localized chromatic aberration effect that I took out in my version. It added many calculations in a separate pass that would be mostly redundant since I have my own chromatic aberration in post processing.
My solution is to simply remove the inclusion of object position (line 6) and desync multiple glitched elements by externally altering the probability parameters. Through experimentation, I found that generating a second seed (line 8) was necessary to make the effect more “random” (i.e. make predictable patterns generated from my simple hash function slightly less obvious ). I also added randomization of the horizontal strip heights (line 16). The horizontal UV displacement of the text atlas textures bleeds adjacent font glyphs into each other, creating a very convincing “glitch” effect.
My modified shader still works on 2D sprites, however it was useful to be able to control the number of horizontal strips created (original shader is hard coded to 5) for sprites of different sizes. I made a separate shader and altered lines 20 — 21 from above to the following:
1
2
float divisionFactor = floor(i.uv.y / ((1/ _DivisionCount) + shiftLineOffset));
i.uv.x += (rand(divisionFactor - timePositionVal, divisionFactor + timePositionVal) - 0.5) * _DispIntensity;
This was separated into a different shader because it was also the shader used to render the “outlined panels” in Part I with an adjustable thickness:
1
2
3
4
5
6
7
8
9
10
fixed4 col = tex2D(_MainTex, i.uv);

_MainTex_TexelSize += _OutlineThickness;
fixed leftPixel = tex2D(_MainTex, i.uv + float2(-_MainTex_TexelSize.x, 0)).a;
fixed upPixel = tex2D(_MainTex, i.uv + float2(0, _MainTex_TexelSize.y)).a;
fixed rightPixel = tex2D(_MainTex, i.uv + float2(_MainTex_TexelSize.x, 0)).a;
fixed bottomPixel = tex2D(_MainTex, i.uv + float2(0, -_MainTex_TexelSize.y)).a;

fixed outline = (1 - leftPixel * upPixel * rightPixel * bottomPixel) * col.a;
return outline * _OutlineColor * i.color;
Note: Full screen glitch flashes in Part I were created by having a full screen “glitching” panel with this shader.
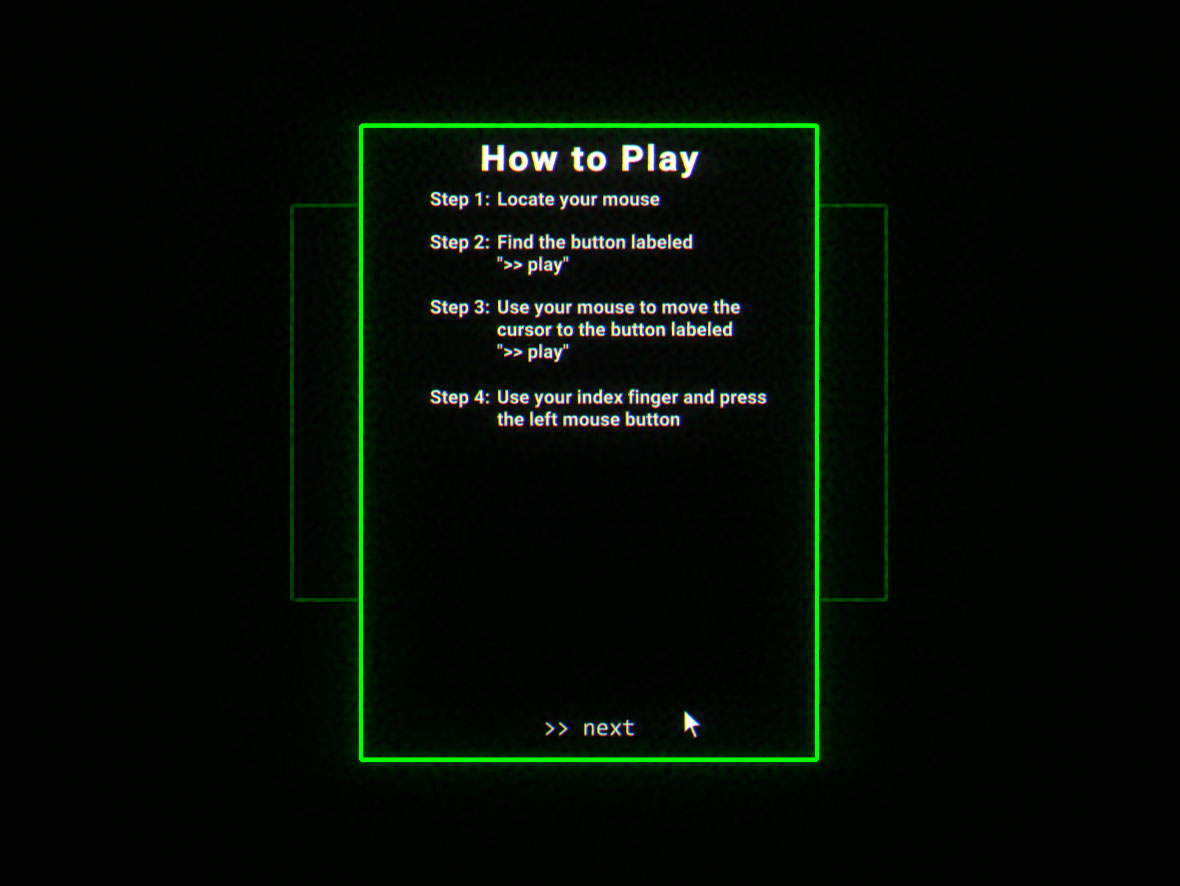 Example of an “outlined panel” in Part I.
Bonus: Yet Another Accident
The SubFrag button shader effect (seen here) was originally planned to be a straight forward effect — overlapped domain warped noises (i.e. offsetting noise uv with another noise value), something I’ve done many times before. At a attempt to make it a little different, I randomly added vertex position (in clip space) to the noise offset in line 5. This created an aesthetic “pixelated wave” effect that ended up as the final shader (I’m not sure why this works theoretically).
1
2
3
4
5
6
7
8
9
10
11
12
13
fixed4 frag(v2f i) : SV_Target {
    fixed4 col = tex2D(_MainTex, i.uv);

    float flow = _FlowDirection * _Time.x;
    float noise2 = Unity_GradientNoise_float(i.uv + float2(0.5, 0.5) * i.vertex + flow, _NoiseScale2);
    float noise = Unity_GradientNoise_float(i.uv - float2(flow, 0) + float2(0.5, 0.5) * noise2, _NoiseScale);

    float outline = Unity_Remap_float(noise, float2(0, 2), float2(-_RemapThreshold, _RemapThreshold));
    fixed4 noiseOverlay = saturate(noise - outline);

    col *= i.vertexColor * noiseOverlay;
    return col;
}
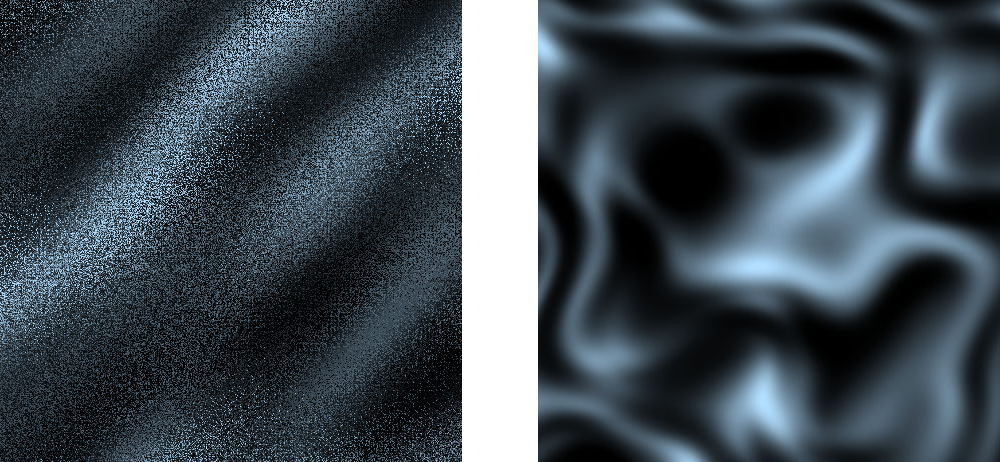 With (left image, final effect) and without (right image)
 i.vertex in line 5.
5.2 FPS Implementation
As mentioned before, I took the opportunity to create a FPS for the first time in this project. Many of these solutions may be obvious to experienced FPS developers, but hopefully my documentation of the struggles and attempts will provide some entertainment. The following are highlights of the more interesting/difficult solutions.
Models in Viewport
One of the most apparent issues to solve in a FPS is making sure the 3D first person models (hand/gun) are rendered properly. In other words, perspective looks correct and the model won’t clip through close geometry. The standard solution of rendering the first person models in a separate camera and lowering the near plane to a reasonable value worked, quick and easy. However, while directional (global) light shadows work with this method, other dynamic shadow sources do not. I experimented extensively with a shader solution to render everything in one camera, but my attempts were too buggy and complex (e.g. projection matrix manipulation for FOV changes). I settled with the former solution.
Muzzle Flash
Muzzle flash is implemented as two 2D sprites in front of the first person gun model. One with bloom for glow effect, and a second larger one behind it to retain the detail of the flash texture. There is a 50% chance every shot that the muzzle flash stays on screen for one less frame, effectively making it sometimes unnoticeable (particularly apparent in lower framerates, effect can be seen in video above). This was done to mimic the rolling shutter effect observed from real life gunfire footage. I assume multiplayer games would require a basic 3D model to see muzzle flashes, but my method worked well for the purposes of this project (the full gunfire effect has additional effects like occasional sparks and world space smoke).
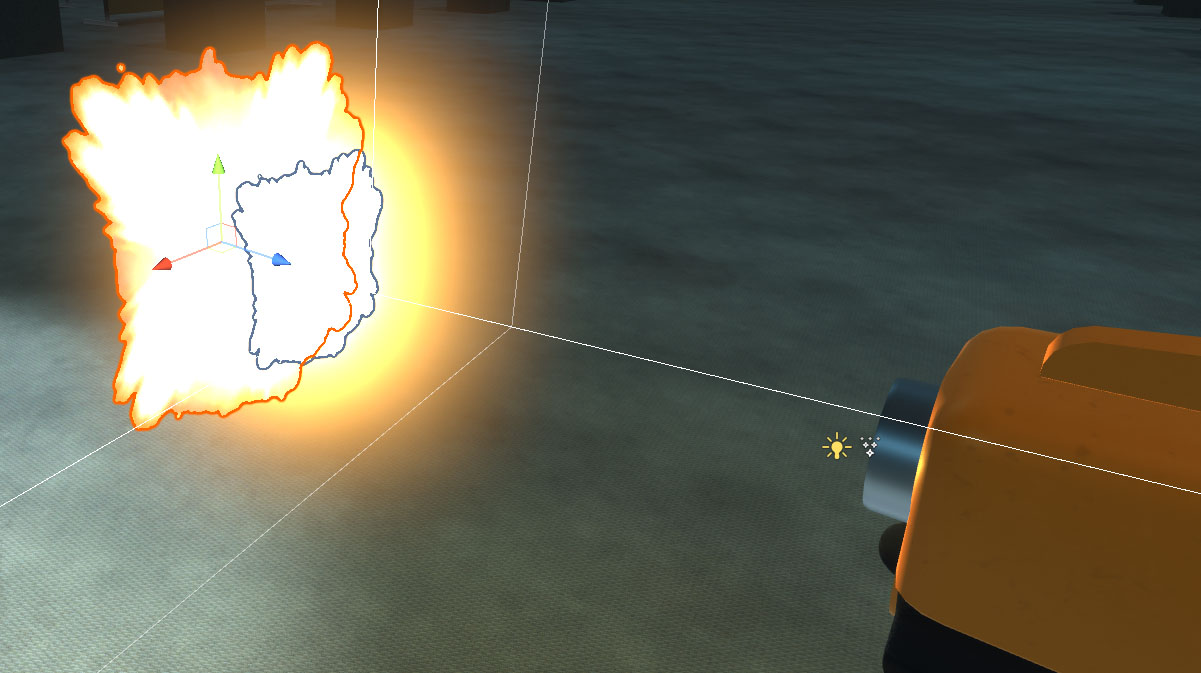 Two sprite muzzle flash effect.
Bullet/Tracer Visuals
A much more time consuming visual issue to resolve was bullet tracer visuals. The core issue is that in almost all modern FPS’s, bullets are shot from the middle of the screen from the world position of the camera. If the projectile is realistically shot from the end of the gun barrel, bullets will often not hit where the crosshair is aiming (especially true for sheer angles and shooting right in front of a wall). However, if the bullet visuals do not come from the gun barrel, it will not look right (i.e. tracers come straight from the centre of the viewport).
After a few days of silly solutions, I came to the conclusion that the answer is the use of two projectiles. An invisible one for collision detection — coming from the centre of the viewport and a second one coming out of the tip of the gun barrel towards a far away position straight ahead for the trail effect. The visual projectile will disappear as soon as the collision projectile hits something (see details). Although there is a practical difference in trajectory, it is not noticeable at all in gameplay. The biggest discrepancy is when players are shooting close objects, but since the bullet moves and gets destroyed fast, it looks correct visually. This cements a concept I learned early in game development — that game visuals often only need to be close enough.
 Visual projectile with smoke effects.
Development Anecdote:
Having no experience with this problem, I’ve tried many overcomplicated solutions such as always shooting the bullet from the barrel towards a far away world position straight in front of the player camera. This worked great for long range shooting, but brings unexpected behavior with aiming at and around close objects.
So I added an additional check to see if the bullet path will hit an object (raycast), if so, I then used a dot product to compare the angle between the standard long range trajectory and the trajectory if the bullet started in the tip of the gun barrel to the hit position from the raycast check. If the angle is too great, shoot from the centre of the viewport (this looked approximately correct when up close to a hit target). The finished implementation was wildly inconsistent and produced unhandled edge cases. In hindsight this was an absurd solution, but here is the archival code below for anyone interested:
1
2
3
4
5
6
7
8
9
10
11
12
13
14
15
16
17
18
19
20
21
22
23
24
25
26
27
28
29
30
31
Vector3 shootOrigin;
Quaternion shootDirection;

Vector3 viewPortCentreWorldPoint = mainCamera.ViewportToWorldPoint(new Vector3(0.5f, 0.5f, 0.0f));

// normalized vector direction from gun bullet exit point to far away position directly in front of player
Vector3 distantLookDirection = ((playerCamTransform.transform.position + playerCamTransform.forward * 1000f) - gunShootOrigin.position).normalized;

// if raycast hit, shoot towards hit point
if(Physics.Raycast(viewPortCentreWorldPoint, playerCamTransform.forward, out hitData, 1000, layerMask: ~(1 << playerLayer))) {
    Vector3 gunTipToHitPoint = (hitData.point - gunShootOrigin.position).normalized;

    // If calculated angle between far away direction (default) and raycast hit point direction is too large,
    //     shoot from centre of screen, straight forward
    // else,
    //     shoot from gun tip to hit point
    // This is to fix shooting from inside a mesh and angles that look too off when close to targets
    if(Vector3.Dot(distantLookDirection, gunTipToHitPoint) < 0.98f) {
        shootOrigin = viewPortCentreWorldPoint;
        shootDirection = Quaternion.LookRotation(playerCamTransform.forward);
    }
    else {
        shootOrigin = gunShootOrigin.position;
        shootDirection = Quaternion.LookRotation(gunTipToHitPoint);
    }
}
// if no raycast hit, shoot towards large distance forward from camera
else {
    shootOrigin = gunShootOrigin.position;
    shootDirection = Quaternion.LookRotation(distantLookDirection);
}
Note: Calculations to launch from the gun barrel, such as line 7 are still used in the working implementation for the visual projectile trajectory.
I’ve also tried solutions that “corrected” the trajectory of the bullet. The bullet would start from the barrel and then quickly jump to the expected centred trajectory. I was not satisfied with the buggy looking visual and inconsistencies.
Custom Bullet Physics
For aesthetic reasons and also as a design goal, I wanted to implement fast bullet projectile physics rather than hitscan (i.e. raycast) hit detection. Launching a projectile is trivial in a ready-made physics engine, however collision checking for an adequately fast and small projectile is a little more complicated; such projectile collisions will be very inconsistent in most real time physics engines. After much tweaking of Unity’s sweep-based/speculative continuous collision detection and physics timesteps, I concluded that I could not get reliable hit detection for a small, fast moving rigidbody with the built-in Unity physics engine.
An easy solution is to slow down the bullets, but I wanted to maintain the feel of the shooting that I envisioned. After some experimentation, I developed a method that was satisfactory: forgo the physics engine completely, move the bullet projectile every frame by adding a movement vector, and raycast between the current position and the calculated position of the next frame to see if there is a collision. I later discovered this is how bullet collision worked in PlanetSide (source), which was encouraging to see that I’m on the right track. Below is this stepped raycast solution for player bullets.
1
2
3
4
5
6
7
8
9
10
11
12
13
14
15
16
17
18
19
20
21
22
23
24
25
26
27
28
29
30
31
32
33
34
35
36
37
38
39
40
41
42
43
44
45
46
47
48
49
50
51
52
53
private void FixedUpdate() {
    if(isMoving) {
        hitDetectProjectile_Transform.position += hitDetectProjectile_Transform.forward * speedDelta;
        trailVisualProjectile_Transform.position += trailVisualProjectile_Transform.forward * speedDelta;

        // raycast between position last frame and this frame
        if(Physics.Raycast(
            hitDetectPosLastFrame, hitDetectProjectile_Transform.forward, out hitData,
            Vector3.Distance(hitDetectPosLastFrame, hitDetectProjectile_Transform.position),
            layerMask: ~((1 << FPSController.PLAYER_LAYER) | (1 << IGNORE_DECAL_LAYER)))) {

            // Prevent potential multi hits because of fixed update
            if(hasHitSomething) {
                return;
            }
            hasHitSomething = true;

            // Get decal instance here first to send it to ragdoll
            // (we need to disable the decals manually when characters die)
            DecalController bulletHoleDecalController = DecalPoolManager.GetDecalInstance();

            GameObject ragdoll = null;

            // If collider with rigidbody is hit,
            // Add force to the rigidbody, in the direction from which it was hit
            if(hitData.collider.attachedRigidbody != null) {
                if(hitData.collider.GetComponent<RagdollHitDetector>() is RagdollHitDetector rdh) {
                    ragdoll = rdh.collisionHandler.GetRagdollParent();
                    rdh.Hit(damage, hitData, bulletHoleDecalController);
                }
                hitData.collider.attachedRigidbody.AddForce(
                    (hitDetectProjectile_Transform.position - hitData.collider.ClosestPoint(hitDetectProjectile_Transform.position)) * force
                );
            }

            // Decal
            // if 'ragdoll' is null here, assume wall/floor hit
            if(hitData.collider.gameObject.layer != IGNORE_DECAL_LAYER) {
                bulletHoleDecalController.Initialize(hitData, ragdoll);
            }

            Despawn();
        }

        hitDetectPosLastFrame = hitDetectProjectile_Transform.position;

        // Destroy after x seconds if nothing hit
        destroyTimer -= Time.deltaTime;
        if(destroyTimer <= 0f) {
            Despawn();
        }
    }
}
Note: This is executed every physics step rather than every frame to be safe. Performance is not a worry since there is only one gun that shoots in the whole scene. Gravity was planned but never added, it can be trivially implemented by altering the movement vector in line 3 — 4.
Dynamic Decals
In a previous 2D project, Last Secutor, I made character blood effects by rendering a blood texture on top of the target material (akin to the blood effect in Dragon Age: Origins) that is transitioned gradually with an alpha threshold. For this game, I wanted to make dynamic bullet hole decals that players would expect from a FPS.
This lead to a long and educational process of trying different methods. I started with the most obvious way in Unity, using the projector component with a basic additive shader. This worked decently well, but the decal would render on top of anything that is in the target layers in the projection box. Also, decals will wrap around corners with unappealing stretched UVs. This lead me to try a few third party mesh decal renderers (I did not attempt to make my own due to time constraints). This worked great for static decals, but because of implementation technicalities, I had issues orienting them on skinned meshes correctly based on collision data.
After lots of flipping back and forth between methods, I settled with the Unity projector component with a custom shader (Unity documentation is quite lacking, this helped me figure out the shader). I faded the alpha of the decal based on the depth coordinate of the projection box so if the decal wraps around geometry, it will fade away rather than noticeably stretch and get cut off abruptly (line 13). If there are other objects in the decal enabled layer group, the decal will render on all of them still (most notable with crumpled ragdolls). The depth fade helps with this issue as the bullet hit point is usually the closest object and intended decal target. I found this solution to be “good enough” as the game’s release date quickly arrived. This will be a starting point for an improved dynamic decal system in future projects.
Additive Cookie Shader for Unity Projector
1
2
3
4
5
6
7
8
9
10
11
12
13
14
15
v2f vert(appdata_t i) {
    v2f o;
    o.pos = UnityObjectToClipPos(i.vertex);
    o.uvShadow = mul(unity_Projector, i.vertex);
    o.normal = i.normal;
    return o;
}

fixed4 frag(v2f i) : SV_Target {
    fixed4 texCookie = tex2Dproj(_ShadowTex, UNITY_PROJ_COORD(i.uvShadow));
    clip(1 + i.uvShadow.z);
    clip(1 - i.uvShadow.z);
    texCookie.a *= saturate(1 - i.uvShadow.z);
    return texCookie * _TintColor + _AdditiveColor * texCookie.a;
}
Note: _ShadowTex is the decal texture provided to material, shader is alpha blended with Blend SrcAlpha OneMinusSrcAlpha. Line 11 — 12 clips the texture outside of the projection box as it caused some artifacts occasionally.
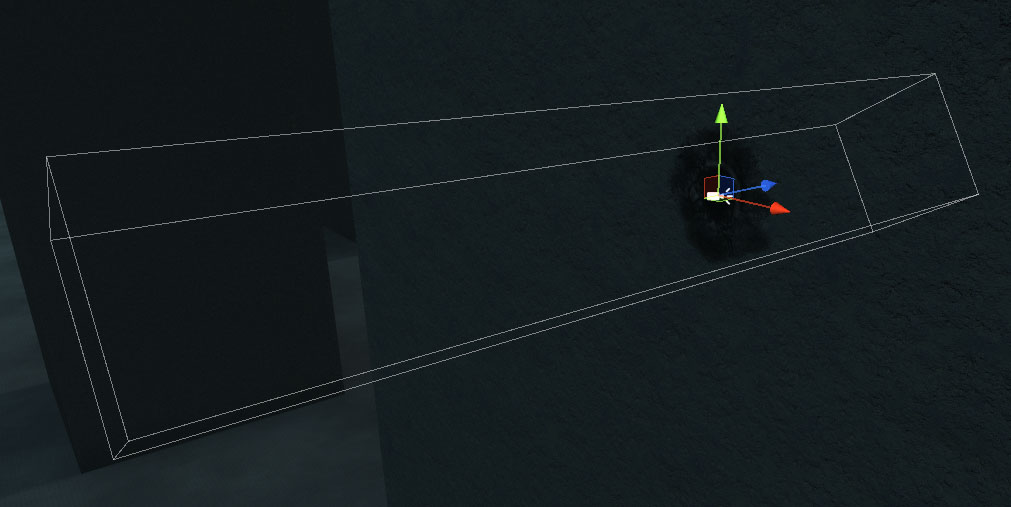 Projection bound of a decal,
 i.uvShadow.z refers to the normalized coordinate of the longest side (i.e. direction of normal) of the box.
An attempt was made to keep the projector orientation (as opposed to making it orthogonal to surface) when attaching the bullet decals to objects to dynamically create stretched bullet holes with an angled projection. This was to simulate the look of angled or grazed bullet hits, like in Back 4 Blood. However, I could not make it look natural enough by fading out edges in the shader. My best guess is that Back 4 Blood uses a separate decal texture based on the angle of approach, a much simpler solution than my angled projector.
5.3 UI Framework
It took a lot of tedious work to make the MalusOS UI convincing enough. As mentioned earlier, many small offset and fade animations are added to create an intentional “overdesigned” look. These animations are all coded as coroutines (as opposed to using Unity’s animation system) and need to be reliably reset when it is interrupted (e.g. closing an app in the middle of it’s bootup animation).
To save some time, I created an object-oriented framework to create and manage these animation coroutines with high level functions. The goal is to be able to attach a class (MalusUIElement) to any UI element as a component (i.e. object instance) to add the animation capability with convenient functions. This is done by interfacing with the mandated RectTransform and CanvasGroup (Unity component to easily control alpha) components and keeping track of all the coroutine instances in a dynamic dictionary in the object instance to allow animation interruption.
Function to Animate Any UI Element (Alpha Fade and Cardinal Movement)
1
2
3
4
5
6
7
8
9
10
11
12
13
14
15
16
17
18
19
20
21
22
23
24
25
26
27
28
29
30
31
32
33
34
35
36
37
38
39
40
41
42
43
44
45
46
47
48
49
50
51
52
53
54
55
56
57
58
59
60
61
62
63
64
65
66
67
68
69
70
private IEnumerator SetVisibilityStateCoroutine(CanvasGroup elementCanvasGroup, bool state, float transitionDuration, Direction transitionDirection, float positionOffset, PanelElementVisibilityData elementData) {
    YieldInstruction WaitForFixedUpdate = new WaitForFixedUpdate();

    RectTransform elementRectTransform = elementCanvasGroup.GetComponent<RectTransform>();

    // Note: if interrupted it will take 'transitionDuration' seconds to lerp from start to end values no matter the starting value
    float startAlpha = elementCanvasGroup.alpha;
    float endAlpha = state ? 1f : 0f;
    float i = 0;

    // This makes transitionDirection match direction of when setting state to true
    if(!state) positionOffset *= -1f;

    Vector2 posOffset = Vector2.zero;
    switch(transitionDirection) {
        case Direction.UP:
            posOffset = new Vector2(0, -positionOffset);
            break;
        case Direction.DOWN:
            posOffset = new Vector2(0, positionOffset);
            break;
        case Direction.LEFT:
            posOffset = new Vector2(positionOffset, 0);
            break;
        case Direction.RIGHT:
            posOffset = new Vector2(-positionOffset, 0);
            break;
    }

    Vector2 originalPos = elementData.originalPosition;
    Vector2 startPos = originalPos + posOffset;
    Vector2 endPos = originalPos;

    // Swap direction if hiding
    if(!state) {
        Vector2 temp = endPos;
        endPos = startPos;
        startPos = temp;
    }

    while(i < transitionDuration) {
        float t = -(Mathf.Cos(3.14f * i / transitionDuration) - 1f) / 2f;
        elementCanvasGroup.alpha = Mathf.Lerp(startAlpha, endAlpha, t);
        elementRectTransform.anchoredPosition = Vector2.Lerp(startPos, endPos, t);

        i += Time.deltaTime;
        yield return WaitForFixedUpdate;
    }

    elementCanvasGroup.SetState(state);

    // always set back to original position after movement, makes saving position simpler
    elementRectTransform.anchoredPosition = originalPos;
    elementData.originalPosition = elementRectTransform.anchoredPosition;

    // Panel Parent only events
    if(panelRectTransform == elementRectTransform) {
        if(state) {
            OnOpenPanel?.Invoke();
        }
        else {
            OnClosePanel?.Invoke();
        }
    }

    // Deactivate gameobject if setting visibility state to false and performance mode is enabled (untested)
    if(b_ActivateGameObjectOnVisibility && !state) {
        elementCanvasGroup.gameObject.SetActive(false);
    }
}
Note: OnOpenPanel and OnClosePanel are public events that can be subscribed to, not necessarily only used for panels
Some Animation Coroutine Interruption Logic (Calls Function Above)
1
2
3
4
5
6
7
8
9
10
11
12
13
14
15
16
17
18
19
if(!visibilityCoroutineDict.TryGetValue(elementCanvasGroup, out PanelElementVisibilityData existentElementVisibilityData)) {
    PanelElementVisibilityData elementData = new PanelElementVisibilityData();
    elementData.originalPosition = elementCanvasGroup.GetComponent<RectTransform>().anchoredPosition;
    elementData.coroutineInstance = StartCoroutine(SetVisibilityStateCoroutine(elementCanvasGroup, state, transitionDuration, transitionDirection, positionOffset, elementData));

    visibilityCoroutineDict.Add(elementCanvasGroup, elementData);
}
else {
    if(existentElementVisibilityData.coroutineInstance != null) {
        StopCoroutine(existentElementVisibilityData.coroutineInstance);
    };

    // update 'originalPosition' for position offset during visibility animation when turning off this panel element
    // this makes it so if elements are moved while it's visible for any reason, the new position is recorded for the
    // next visibility transition (this can happen if transition is interrupted)
    existentElementVisibilityData.originalPosition = elementCanvasGroup.GetComponent<RectTransform>().anchoredPosition;

    existentElementVisibilityData.coroutineInstance = StartCoroutine(SetVisibilityStateCoroutine(elementCanvasGroup, state, transitionDuration, transitionDirection, positionOffset, existentElementVisibilityData));
}
For example, the app window controller class that manages various open/close/resize operations and events inherits from the MalusUIElement class. One of the motivations for an object-oriented solution was to encourage encapsulation by storing all managed animation coroutines within the relevant UI objects. In hindsight, this was mostly unnecessary as it would be possible to store all UI animation coroutines in a singleton class.
This implementation worked as intended and saved a lot of time with elaborate UI sequences such as the MalusOS app intros and the “MalNews” article display. However, I still reset positions and alpha values in code outside of the framework to safely interrupt many of the animation sequences (some animation didn’t fully reset to it’s initial state with extreme cases such as very rapid clicking from the user). Although the framework ended up not as robust as I would like, it worked very well for this game’s limited use case and it was not worth spending any more time perfecting the interruption logic for all edge cases.
